fs0:
=> enter USB disk
=================================================
製作 EFI SHELL 開機隨身碟
EFI Shell是以UEFI為基礎而生的類似小型OS功能,其功能、指令就與Linux Shell一般,而使用者最常使用EFI Shell來更新韌體。
Step 1. 一支格式為 [FAT32] 的USB隨身碟。
Step 2. 下載 Bootx64.efi (主版廠官網 OR https://github.com/tianocore/edk2/raw/master/ShellBinPkg/UefiShell/X64/Shell.efi 下載後改名為 Bootx64.efi)。
Step 3. 將 Bootx64.efi 檔案放到隨身碟的路徑下 :\efi\boot。
Step 4. 在BIOS的開機選項 UEFI mode
Step 5. 使用 Unsigned 的 .efi 時,需 Disable Secure Boot。
2018年11月14日 星期三
2018年9月20日 星期四
[轉貼 | 備份] PCI Read/Write 0xcf8 0xcfc
出處
http://blog.xuite.net/huaanvgs/blog/137026031-PCI+Read%2FWrite
BIOS入門的第一課大部分都會遇到PCI的作業,前輩們往往都會出個簡單的作業,要求我們去讀寫PCI configuaration space,到底我們該如何去做呢?
根據PCI Local Bus Specification 3.0有提到,"Every device, other than host bus bridges, must implement Configuration Address Space. Host bus bridges may optionally implement Configuration Address Space. In the Configuration Address Space, each function is assigned a unique 256-byte space that is accessed differently than I/O or Memory Address Spaces"
也就是說讀寫PCI的方式有兩種,一種是透過I/O(CF8/CFC)而另一種則是利用MMIO的方式來去讀寫PCI configuration space.
在介紹這兩種讀寫方法以前,我們先來看PCI spec.如何定義Configuration commands。為了支援階層式的PCI buses,在此使用兩種類型的configuration transactions,如Figure 1所示。

Type0: A Type 0 configuration transaction (when AD[1::0] = “00”) is used to select a device on the bus where the transaction is being run.
Type1: A Type 1 configuration transaction (when AD[1::0] = “01”) is used to pass a configuration request to another bus segment.
而IDSEL(Initialization Device Select)是指"it used as a chip select during configuration
read and write transactions." 這部分會連接到PCI AD[31:11],是由硬體拉線所決定的。
其中IDSEL可以辨別PCI的身分,當硬體解出來的configuration cycle為Type0時,會做以下兩件事:1.遮罩[31:11],2.解碼Device number。相反的,當硬體解出的configuration cycle為Type1時,他會做以下的事:1.當bus number和secondary bus number一致時,會將Type1轉成Type0,也就是Bit0設為1,並做Type0該做的事;當bus number和secondary bus number不一致時,則會往下一層送。
透過IDSEL辨別Type0和Type1的方式,我們可以完成PCI的Scan,但在Type0的configuration transactions中好像沒有定義Bus number與Devce number,那麼如何去做transactions呢?還記得Type0的定義,他是在相同的bus下去選擇device,而device number我們又可以透過解碼的方式去獲得,因此就不會有找不到的問題。
Software Generation of Configuration Transactions
系統必須提供一種機制來讓軟體有辦法去Access PCI configuration space,前面有提到可以透過I/O space及MMIO space的方式去存取,但PCI device還沒分配resource之前,還是只能透過I/O space的方式去access。
"Two DWORD I/O locations are used to generate configuration transactions for PC-AT compatible systems. The first DWORD location (CF8h) references a read/write register that is named CONFIG_ADDRESS. The second DWORD address (CFCh) references a read/write register named CONFIG_DATA."
Figure 2為針對CONFIG_ADDRESS所定義的Layout,其中:

由上面定義可以得知最多支援的Bus number為256(2的8次方),最多支援的device number為32(2的5次方),最多支援的function number為8(2的3次方),可以讀取的configuration space為256(2的8次方),速記為8538。
看到這邊,或許會對configuration space有疑問,在Figure 2不是只有用Bit[7:2]去定義嗎,為什麼可以讀到256個呢?這是因為上面定義Bit[1:0]在Read的時候必須是0,所以如果我們要去Read/Write的space剛好在Bit[1:0]不為0的時候只能利用偏移的方式去做讀取,我們之後會有一個小小的範例做說明。
接著我們看這兩種Type的configuration commands如何與SW做結合。

自Figure 3我們可以看到,假設IDSEL辨別為Type0,自然就知道Bus number,而device number可以透過解碼方式獲得,並填到Bit[31:11]中的其中一個,剩下的Function number和Register number則複製到PCI AD BUS當中。
如果IDSEL辨別為Type1,則是將CONFIG_ADDRESS全部複製到PCI AD line當中,當然Bit0也必須是1。
PCI R/W sample:
參考Figure 4,如下:

Step1:
我們知道透過I/O space(CF8/CFC)可以Read/Write Configuration space,其中把要讀取該Space的PFA填入Config_Address(CF8)後,在Config_Data(CFC)就可以得到該資料。
Step2:
有了步驟1的知識後,我們要先計算出PFA,回顧Figure 2所示,我們必須將要讀取的BUS,Dev,Fun及Offset填入Config_Address所對應的Layout,其中Bit31必須為1,Bit[1:0]必須為0(如果剛好不為0可以用偏移方式讀取),其分析如下:
PFA = 8000D83C h

http://blog.xuite.net/huaanvgs/blog/137026031-PCI+Read%2FWrite
根據PCI Local Bus Specification 3.0有提到,"Every device, other than host bus bridges, must implement Configuration Address Space. Host bus bridges may optionally implement Configuration Address Space. In the Configuration Address Space, each function is assigned a unique 256-byte space that is accessed differently than I/O or Memory Address Spaces"
也就是說讀寫PCI的方式有兩種,一種是透過I/O(CF8/CFC)而另一種則是利用MMIO的方式來去讀寫PCI configuration space.
在介紹這兩種讀寫方法以前,我們先來看PCI spec.如何定義Configuration commands。為了支援階層式的PCI buses,在此使用兩種類型的configuration transactions,如Figure 1所示。

Figure 1
在Figure 1中我們可以看到兩種不同的configuration commands,分別為Type0和Type1,其中Type0: A Type 0 configuration transaction (when AD[1::0] = “00”) is used to select a device on the bus where the transaction is being run.
Type1: A Type 1 configuration transaction (when AD[1::0] = “01”) is used to pass a configuration request to another bus segment.
而IDSEL(Initialization Device Select)是指"it used as a chip select during configuration
read and write transactions." 這部分會連接到PCI AD[31:11],是由硬體拉線所決定的。
其中IDSEL可以辨別PCI的身分,當硬體解出來的configuration cycle為Type0時,會做以下兩件事:1.遮罩[31:11],2.解碼Device number。相反的,當硬體解出的configuration cycle為Type1時,他會做以下的事:1.當bus number和secondary bus number一致時,會將Type1轉成Type0,也就是Bit0設為1,並做Type0該做的事;當bus number和secondary bus number不一致時,則會往下一層送。
透過IDSEL辨別Type0和Type1的方式,我們可以完成PCI的Scan,但在Type0的configuration transactions中好像沒有定義Bus number與Devce number,那麼如何去做transactions呢?還記得Type0的定義,他是在相同的bus下去選擇device,而device number我們又可以透過解碼的方式去獲得,因此就不會有找不到的問題。
Software Generation of Configuration Transactions
系統必須提供一種機制來讓軟體有辦法去Access PCI configuration space,前面有提到可以透過I/O space及MMIO space的方式去存取,但PCI device還沒分配resource之前,還是只能透過I/O space的方式去access。
"Two DWORD I/O locations are used to generate configuration transactions for PC-AT compatible systems. The first DWORD location (CF8h) references a read/write register that is named CONFIG_ADDRESS. The second DWORD address (CFCh) references a read/write register named CONFIG_DATA."
Figure 2為針對CONFIG_ADDRESS所定義的Layout,其中:

Figure 2
where
Bit[31]: It is an enable flag for determining when accesses to CONFIG_DATA are to be translated to configuration transactions on the PCI bus.
Bit[30:24]: Reserved
Bit[23:16]: Bits 23 through 16 choose a specific PCI bus in the system.
Bit[15:11]: Bits 15 through 11 choose a specific device on the bus.
Bit[10:8]: Bits 10 through 8 choose a specific function in a device.
Bit[7:2]: Bits 7 through 2 choose a DWORD in the device's Configuration Space.
Bit[1:0]: Bits 1 and 0 are read-only and must return 0's when read.
由上面定義可以得知最多支援的Bus number為256(2的8次方),最多支援的device number為32(2的5次方),最多支援的function number為8(2的3次方),可以讀取的configuration space為256(2的8次方),速記為8538。
看到這邊,或許會對configuration space有疑問,在Figure 2不是只有用Bit[7:2]去定義嗎,為什麼可以讀到256個呢?這是因為上面定義Bit[1:0]在Read的時候必須是0,所以如果我們要去Read/Write的space剛好在Bit[1:0]不為0的時候只能利用偏移的方式去做讀取,我們之後會有一個小小的範例做說明。
接著我們看這兩種Type的configuration commands如何與SW做結合。

Figure 3
自Figure 3我們可以看到,假設IDSEL辨別為Type0,自然就知道Bus number,而device number可以透過解碼方式獲得,並填到Bit[31:11]中的其中一個,剩下的Function number和Register number則複製到PCI AD BUS當中。
如果IDSEL辨別為Type1,則是將CONFIG_ADDRESS全部複製到PCI AD line當中,當然Bit0也必須是1。
PCI R/W sample:
參考Figure 4,如下:

Figure 4
如圖Figure 所示,假設我們要讀取Bus00, Dev1B,Fun00的Offset3C(Interrupt Line),那麼我們應該如何做呢?步驟描述如下:Step1:
我們知道透過I/O space(CF8/CFC)可以Read/Write Configuration space,其中把要讀取該Space的PFA填入Config_Address(CF8)後,在Config_Data(CFC)就可以得到該資料。
Step2:
有了步驟1的知識後,我們要先計算出PFA,回顧Figure 2所示,我們必須將要讀取的BUS,Dev,Fun及Offset填入Config_Address所對應的Layout,其中Bit31必須為1,Bit[1:0]必須為0(如果剛好不為0可以用偏移方式讀取),其分析如下:
| 31 | 30 | 29 | 28 | 27 | 26 | 25 | 24 | 23 | 22 | 21 | 20 | 19 | 18 | 17 | 16 | 15 | 14 | 13 | 12 | 11 | 10 | 9 | 8 | 7 | 6 | 5 | 4 | 3 | 2 | 1 | 0 |
| 1 | 0 | 0 | 0 | 0 | 0 | 0 | 0 | 0 | 0 | 0 | 0 | 0 | 0 | 0 | 0 | 1 | 1 | 0 | 1 | 1 | 0 | 0 | 0 | 0 | 0 | 1 | 1 | 1 | 1 | 0 | 0 |
PFA = 8000D83C h
以Tool RW來示範的話就是利用I/O CF8填入PFA,然後在CFC的Offset 00h可以得到Interrupt Line的值16h,如圖Figure 5所示。

Figure 5
如果用組合語言來表示我們可以描述如下:
mov dx, cf8h
mov eax, 8000d83ch (PFA)
out dx, eax
mov dx, cfch
in eax, dx
如此,我們可以在EAX的Offset 00h得到我們要讀取的值。
2018年9月18日 星期二
[ 轉貼 | 備份] Blogger 變更字型,更換中文字型如:微軟正黑體、標楷體
出處
https://www.xiaoyao.tw/2017/07/blogger-font.html
備份
Blogger 筆記:網頁中文字型變更為正黑體或標楷體。
使用 Blogger 主題設計工具可以設定部落格版面各項字型,網站標題、文章標題、文章內容、側邊欄工具、、等等,每個項目都可逐一設定大小顏色與字體。只是預設的字型並沒有中文字型可以選擇,不管挑選哪種字型,變化的都是英文跟數字的部分,中文字始終顯示新細明體。想要更換部落格中文字體,可以編輯 HTML 添加喜歡的字型上去。

操作說明:
(編輯HTML前先備份範本,備份說明)
Blogger 管理後台「主題」→「自訂」開啟主題設計工具,可修改部落格主題。

「主題設計工具」→「進階」可調整文字字型、大小、顏色。

想要使用 Blogger 預設以外的字型,「編輯 HTML」將字型加入主題。

編輯 HTML:點擊第一個箭頭處,將隱藏的段落展開(行數不一定,依主題修改程度有所差異)。

Variable definitions:定義各項設定值,Page Text:網頁文字。

body.font:文章內文字型。

上段指令中「default」預設使用字型;「value」指定使用字型。將字型添加到 「value」段落中 15px (字體大小)後面。修改後如下:
其中「’文泉驛正黑’」=「’WenQuanYi Zen Hei’」,中文與英文表示方式都使用,因電腦系統若是英文會無法使用「文泉驛正黑」。同時添加多種字型,會按照順位依序替補,若觀看網頁的電腦無法使用第一種則使用第二順位。「sans-serif」則是通用字型.所有電腦都會有的。
字型若只有一個單字;如「Arial」;不需要加上單引號「’ ’」。兩個單字以上就須加上單引號;如:「’WenQuanYi Zen Hei’」「’文泉驛正黑’」。單引號在編輯 HTML 儲存後則顯示「& # 3 9 ;」字串。(如下圖)

這篇主要紀錄編輯 HTML 增加中文字型所學的,以備將來恢復記憶使用。若文章中有說明不清楚或是想瞭解更多,請參考下列文章。
參考文章:
修改各處 CSS(文章標題+內文+其他),以字型大小顏色舉例
網頁中英文字型(font-family)跨平台設定最佳化
打造部落格(一):讓版面更容易閱讀的幾個調整方案
https://www.xiaoyao.tw/2017/07/blogger-font.html
備份
Blogger 筆記:網頁中文字型變更為正黑體或標楷體。
使用 Blogger 主題設計工具可以設定部落格版面各項字型,網站標題、文章標題、文章內容、側邊欄工具、、等等,每個項目都可逐一設定大小顏色與字體。只是預設的字型並沒有中文字型可以選擇,不管挑選哪種字型,變化的都是英文跟數字的部分,中文字始終顯示新細明體。想要更換部落格中文字體,可以編輯 HTML 添加喜歡的字型上去。

操作說明:
(編輯HTML前先備份範本,備份說明)
Blogger 管理後台「主題」→「自訂」開啟主題設計工具,可修改部落格主題。

「主題設計工具」→「進階」可調整文字字型、大小、顏色。

想要使用 Blogger 預設以外的字型,「編輯 HTML」將字型加入主題。

編輯 HTML:點擊第一個箭頭處,將隱藏的段落展開(行數不一定,依主題修改程度有所差異)。

Variable definitions:定義各項設定值,Page Text:網頁文字。

body.font:文章內文字型。

Variable name="body.font" description="Font" type="font"

default="normal normal 15px Arial, Tahoma, Helvetica, FreeSans, sans-serif" value="normal normal 15px 'Trebuchet MS',Trebuchet,sans-serif"
上段指令中「default」預設使用字型;「value」指定使用字型。將字型添加到 「value」段落中 15px (字體大小)後面。修改後如下:
Variable name="body.font" description="Font" type="font"

default="normal normal 15px Arial, Tahoma, Helvetica, FreeSans, sans-serif" value="normal normal 15px Arial, '文泉驛正黑', 'WenQuanYi Zen Hei', '儷黑 Pro', 'LiHei Pro', '微軟正黑體', 'Microsoft JhengHei', 'sans-serif'
其中「’文泉驛正黑’」=「’WenQuanYi Zen Hei’」,中文與英文表示方式都使用,因電腦系統若是英文會無法使用「文泉驛正黑」。同時添加多種字型,會按照順位依序替補,若觀看網頁的電腦無法使用第一種則使用第二順位。「sans-serif」則是通用字型.所有電腦都會有的。
字型若只有一個單字;如「Arial」;不需要加上單引號「’ ’」。兩個單字以上就須加上單引號;如:「’WenQuanYi Zen Hei’」「’文泉驛正黑’」。單引號在編輯 HTML 儲存後則顯示「& # 3 9 ;」字串。(如下圖)

這篇主要紀錄編輯 HTML 增加中文字型所學的,以備將來恢復記憶使用。若文章中有說明不清楚或是想瞭解更多,請參考下列文章。
參考文章:
修改各處 CSS(文章標題+內文+其他),以字型大小顏色舉例
網頁中英文字型(font-family)跨平台設定最佳化
打造部落格(一):讓版面更容易閱讀的幾個調整方案
2018年3月8日 星期四
Sata Mode IDE 不重裝 OS 改成 AHCI
Windows 7
regiedt
HKEY_LOCAL_MACHINE\SYSTEM\CurrentControlSet\services\msahci
Start 3 (IDE) -> 0 (AHCI)
重開機
進 BIOS 改 SATA 設定至 AHCI, 即可正常進 OS.
regiedt
HKEY_LOCAL_MACHINE\SYSTEM\CurrentControlSet\services\msahci
Start 3 (IDE) -> 0 (AHCI)
重開機
進 BIOS 改 SATA 設定至 AHCI, 即可正常進 OS.
2017年11月30日 星期四
USB key 變 installation CD & 安裝 Win OS 在 USB device
[可將安裝光碟片變成由 USB key 安裝 OS]
[可以安裝 OS 到 USB key 上,但速度慢,建議裝在 USB disk or 高速認證的 USB key.]
[試一下 Win10 Enterprise 安裝,沒找到 USB key 的安裝選項,待研究。]
How to create Windows To Go using WinToUSB?
Have you ever imagined that to use your own Windows 10/8.1/8/7 OS wherever you go?
As we all know, we are unable to install Windows to an external hard drive or USB flash drive by default.
When you attempt to install Windows on an external hard drive,
you will get the "Windows cannot be installed to this disk" error. Fortunately,
the Enterprise version of Windows 10/8.1/8 has a feature called Windows To Go that
lets you install and run Windows on a Windows To Go Certified Drive. Unfortunately,
most of us don't have the Enterprise edition of Windows 10/8.1/8, nor a certified
Windows To Go drive. But don’t worry! Here you can find the complete solution about
how to install Non-Enterprise Windows 10/8.1/8/7 on a Non-Certified Windows To Go Drive with WinToUSB.
[Windows To Go Creator]
There are three ways to install/clone Windows to an external hard drive or a USB flash drive as a Windows To Go Worksapce:
Image To USB: Create Windows To Go from an ISO/WIM/ESD/SWM/VHD/VHDX file.
CDROM To USB: Create Windows To Go from a CD/DVD drive.
Physical To USB: Clone current Windows OS to a USB drive as portable Windows.
[Windows installation USB Creator]
Image To USB: Create Windows installer from an ISO/WIM/ESD/SWM/VHD/VHDX file.
Download from
https://www.easyuefi.com/wintousb/index.html
- Windows 7 is not completely portable. You may have driver problems when booting on different computers,
so highly recommend using Windows 10/8.1/8 to create portable Windows.
- Windows 7 does not have built-in USB 3.0 support, so Windows 7 will have to be booted from a USB 2.0 port.
- The common USB flash drives are very slow. It takes a long time to install and run Windows from a common USB flash drive,
highly recommend using a USB hard disk, a Windows To Go Certified Drives, a SanDisk Extreme CZ80 USB 3.0 Flash Drive or
a SanDisk Extreme PRO CZ88 USB 3.0 Flash Drive to create portable Windows.
- Windows To Go drives can be booted on different computers, so you can carry it to anywhere and use it on any computer.
- You need to be an administrator on the computer you are installing the WinToUSB on.
[Use Windows 10 Enterprise CD install, cannot find USB disk to be selected, Windows To Go, sure?]
2017年11月16日 星期四
PXE Server Serva setup step
參考網址 http://www.rmprepusb.com/tutorials/serva
Server 建製 -
1. Download free version from Serva officail site. (Pro version need money.)
x86, x64 version. install it.
下載 Serva tool, 安裝。
2. Create "SERVA_ROOT" folder in C:\.
C 槽下開一資料夾 SERVA_ROOT。
3. To NIC to set TCP/IPv4 to assign IP 192.168.0.1.
網路設成指定 ip,找到 TCP/IPv4 那裡設定

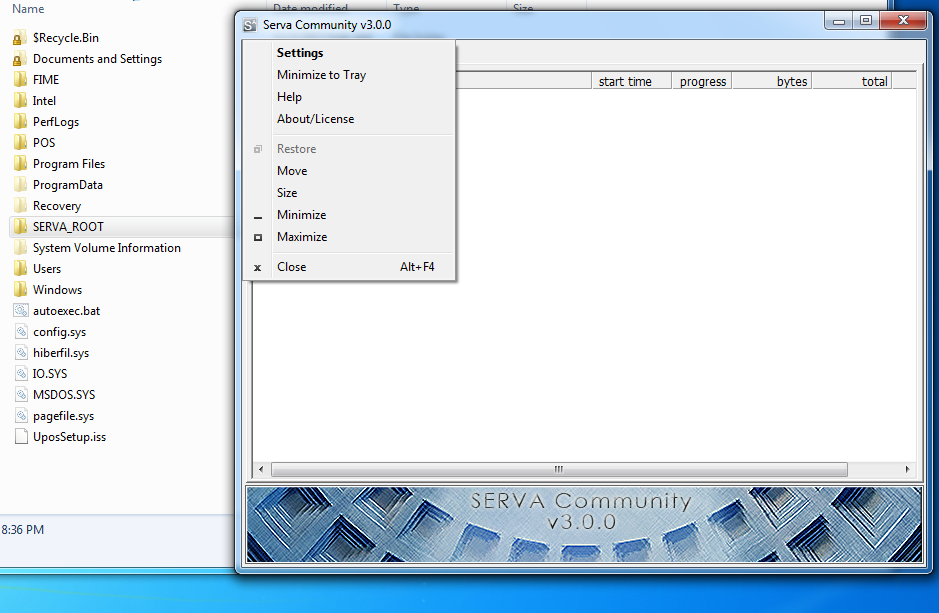
4. Run Serva.exe and click Left Top side icon to select Settings
(if you get a Windows FireWall warning then ALLOW the program access through the firewall)
執行 Serva, 按左上角的 Icon 選擇 Settings. 記得關掉防火牆。
5. Click on the TFTP tab and set the Root directory to C:\SERVA_ROOT and Checked the TFTP Server item.

6. Settings -> DHCP -> Checked DHCP Server, Checked BINL, Input IP Pool 1st addr, Pool size, Subnet Mask.

7. Quit the app and re-run the Serva.exe app again. This is necessary because when Serva re-starts it will generate the PXE download files according to what folders you have created. Serva only does this when it starts. If you make any changes to the folders under C:\SERVA_ROOT then you should always quit and re-run Serva before you try a PXE boot.
8. Check that there are now some folders underneath the C;\SERVA_ROOT folder
9. Set up a Windows share to the C:\SERVA_ROOT\WIA_WDS folder and after that, use the Windows Advanced Properties dialogue (click on the folder and then click Properties - Sharing) to set access for Everyone and set the Share name to WIA_WDS_SHARE.
10. Copy the contents of your Windows 7 (or Win8 or Vista or Server 2K8R2) DVD to a new folder - e.g. copy a Win 7 SP1 32-bit install DVD to C:\SERVA_ROOT\WIA_WDS\Win7_32_SP1
另外把 client 的 NIC Net Interface Card 的 driver copy 到 OEM/Boot/1/WinPEDrivers/NIC 資料夾裡。
網卡 driver,例如 Client 是 Pearl project,從 Pearl LAN driver package 裡取得。

11. If you have more DVDs, just make a new folder for each of them under C:\SERVA_ROOT\WIA_WDS
12. If you have NT OS source files (e.g. 2003, XP or Server2K8 non-R2) then put these under C:\SERVA_ROOT\WIA_RIS and share the C:\SERVA_ROOT folder as WIA_RIS_SHARE (see doc on website). Make sure "Everyone" group has read permission on the just created share. You also need to set a Null Session share on the C:\SERVA_ROOT folder.

13. Quit the Serva app and re-run it
14. Now try to PXE boot your target system
15. For a WDS install (Vista, Win7,Win8, SVR2K8R2), you will be prompted for a username and password - use your host PC computername\username and password - e.g. mynewHP\Administrator myhppwd.
Serva Server USER count 一定要設密碼 (例: PXEServer / pxe )

16. Clinet 和 Serva server 用 LAN Hub 串接。 Serva 程式執行。
17. Clinet 方設定 boot from Network. 輸入 serva server OS 的 user name 與 password (例: PXEServer / pxe )

= BM / PXESERVA / BIOS / pxeserva.cfg / menu.def 的 menu label 可以改裝設 OS 的名稱
= WinPE 怎麼用,尚未研究。
訂閱:
意見 (Atom)